English (UK)

This post is made to teach you how to create and set up a simple fully functional Telegram bot written in pure C#.
We have already written a Telegram bot from scratch in PHP language here.
Now let's try to do the same in C#.
There are many good ready to use SDKs written in C#.
This is only a simple tutorial that explains how to interact with the Telegram APIs without use of any SDK.

Bots are third-party applications that run inside Telegram. Users can interact with bots by sending them messages, commands and inline requests.
At the core, Telegram Bots are special accounts that do not require an additional phone number to set up.
Messages, commands and requests sent by users are passed to the software running on your servers.
Telegram intermediary server handles all encryption and communication with the Telegram API for you. You communicate with this server via a simple HTTPS-interface that offers a simplified version of the Telegram API.
Telegram Bot API is an HTTP-based interface created for developers keen on building bots for Telegram.

How do I create a bot? There's a... bot for that.
BotFather is the one bot to rule them all. It will help you create new bots and change settings for existing ones.
Message @BotFather with the /newbot command to create a new bot. The BotFather will ask you for a name and username, then generate an authorization token for your new bot.
If you don't know how to message by username, click the search field on your Telegram app and type @BotFather, where you should be able to initiate a conversation. Be careful not to send it to the wrong contact, because some users have similar usernames to BotFather.
The name of your bot is displayed in contact details and elsewhere.

The Username is a short name, to be used in mentions and telegram.me links. Usernames are 5-32 characters long and are case insensitive, but may only include Latin characters, numbers, and underscores. Your bot's username must end in ‘bot’, e.g. ‘tetris_bot’ or ‘TetrisBot’.

The token is a string like this 110201543:AAHdqTcvCH1vGWJxfSeofSAs0K5PALDsaw that is required to authorize the bot and send requests to the Bot API. Keep your token secure and store it safely, it can be used by anyone to control your bot.
If your existing token is compromised or you lost it for some reason, use the /token command to generate a new one.

In order to make your Bot answering to requests from your Telegram users you can register a WebHook to automatically being called once updates are available.
The quickest and easiest way to set a WebHook for your Bot is to issue a GET request to the Bot API.
All you have to do is to call the setWebHook method in the Bot API via the following url write in your browser


https://api.telegram.org/bot{my_bot_token}/setWebhook?url={url_to_send_updates_to}
            

where
my_bot_token is the token you got from BotFather when you created your Bot
url_to_send_updates_to is the url of the piece of code you wrote to implement your Bot behavior (in order to set a Webhook you need a server with HTTPS)
For instance


https://api.telegram.org/bot123456:ABC-DEF1234ghIkl-zyx57W2v1u123ew11/setWebhook?url=https://www.example.com/mybot
            

And you’ve got it.
Now if you go to the following url (you have to replace {my_bot_token} with your Bot Token)


https://api.telegram.org/bot{my_bot_token}/getWebhookInfo
            

you should see something like this


{
    "ok":true,
    "result": 
    {
        "url":"https://www.example.com/mybot",
        "has_custom_certificate":false,
        "pending_update_count":0,
        "max_connections":40
     }
}                
            

If you don't have an https domain, you can cyclically query Telegram servers, instead of waiting for notifications, using the "getUpdates" method offered by API.
In this article we find out how it works.

It allows you to query the incoming messages with Telegram chatbots.
If you go to the following url (you have to replace {my_bot_token} with your Bot Token)


https://api.telegram.org/bot{my_bot_token}/getUpdates
            

you should see something like this


{ "ok":true, "result":[
    { "update_id":update_id, "message":{ 
        "message_id":6, "from":{ 
            "id":my_chat_id, "is_bot":false, "first_name":"Lorenzo",
            "username":"my_user_name", "language_code":"it" },
        "chat":{ "id":my_chat_id, "first_name":"Lorenzo",
            "username":"my_user_name", "type":"private" },
        "date":1619087941,
        "text":"Hello!" } }
] }               
            

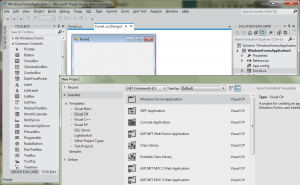
So let's start with the main code of our project.
Let's prepare the loop that queries the api servers


int update_id = 0;
while (true) {
    try {
        StringReader rdr = new StringReader(TBot.GetUpdates(update_id));
        JsonParser parser = new JsonParser(rdr, true);
        JsonObject obj = parser.ParseObject();
                
        if ((JsonString)obj["ok"].ToString() == "true") {
            JsonArray incomingmsgs = (JsonArray)obj["result"];
                
            if (incomingmsgs.Count != 0) {
                JsonObject msg = (JsonObject)incomingmsgs[0];
                // Dirty filter message type
                try {
                    JsonObject currmsg = (JsonObject)msg["message"];
                    JsonObject chat = (JsonObject)currmsg["chat"];
                    TBot.ElabMsg(chat["id"].ToString(), currmsg["text"].ToString());
                } catch (Exception e) {
                    Console.WriteLine("Incoming type ignored");
                }
                update_id = int.Parse(msg["update_id"].ToString()) + 1;
            }
        } else Console.WriteLine("Error to elab incoming");
        Thread.Sleep(1000);
    } catch (Exception e) {
        Console.WriteLine("Error to call Telegram API");
    }
}                
            

I group atomic functions in a TBot class


static string baseurl = "https://api.telegram.org";

static internal string GetUpdates(int offset) {
    string json = "{}";
    WebRequest request = WebRequest.Create(String.Format(
        "{0}/bot{1}/getUpdates?offset={2}",
        baseurl, Properties.Settings.Default.BotToken, offset));
    request.ContentType = "application/x-www-form-urlencoded ; charset=UTF-8";
    request.Method = "GET";
    using (WebResponse response = request.GetResponse()) {
        using (var reader = new StreamReader(
            response.GetResponseStream(), ASCIIEncoding.ASCII)) {
            json = reader.ReadToEnd();
        }
    }
    return json;
}                
            

Then you can process the incoming message


static internal void ElabMsg(string chatid, string text) {
    if (text == null) return;
    bool ElaboratMsg = true;
                   
    // Check if is command
    if (text.Split(' ')[0].Substring(0, 1) == "/") {
        switch (text.Split(' ')[0].ToLower()) {
            case "/start":
                // ToDo code
                ElaboratMsg = false;
                break;
        }
    } else {
        if (ElaboratMsg) {
            // ToDo code
            ElaboratMsg = false;
        }
    }
}                   
            

Telegram commands are texts starting with a /. We can parse it by this char.
To send a reply message you can use this function


static internal void SendMsg(string chatid, string text) {
    WebRequest request = WebRequest.Create(String.Format(
        "{0}/bot{1}/sendMessage?chat_id={2}&text={3}",
        baseurl, Properties.Settings.Default.BotToken, chatid, text));
    request.ContentType = "application/x-www-form-urlencoded ; charset=UTF-8";
    request.Method = "POST";
    using (WebResponse response = request.GetResponse()) {
        request.Timeout = 10000;
    }
}                   
            

If you want to send an image or a document, you need to stream the file.

When you have sent the file, Telegram returns a file id that you can use if you want to send the same file again without sending the stream.
You need a support function


static internal string InputOnlineFile(HttpWebRequest request, string file,
string type, NameValueCollection formFields = null) {
    string boundary = "----------------------------" + DateTime.Now.Ticks.ToString("x");
               
    request.ContentType = "multipart/form-data; boundary=" + boundary;
    request.Method = "POST";
    request.KeepAlive = true;
               
    Stream memStream = new MemoryStream();
    var boundarybytes = Encoding.ASCII.GetBytes("\r\n--" + boundary + "\r\n");
    var endBoundaryBytes = Encoding.ASCII.GetBytes("\r\n--" + boundary + "--");
               
    string formdataTemplate = "\r\n--" + boundary +
        "\r\nContent-Disposition: form-data; name=\"{0}\";\r\n\r\n{1}";
               
    if (formFields != null)
        foreach (string key in formFields.Keys) {
            string formitem = string.Format(formdataTemplate, key, formFields[key]);
            byte[] formitembytes = Encoding.UTF8.GetBytes(formitem);
            memStream.Write(formitembytes, 0, formitembytes.Length);
        }
               
    string headerTemplate =
        "Content-Disposition: form-data; name=\"{0}\"; filename=\"{1}\"\r\n" +
        "Content-Type: application/octet-stream\r\n\r\n";
               
    memStream.Write(boundarybytes, 0, boundarybytes.Length);
    string header = string.Format(headerTemplate, type, Path.GetFileName(file));
    var headerbytes = Encoding.UTF8.GetBytes(header);
    memStream.Write(headerbytes, 0, headerbytes.Length);
    using (FileStream fileStream = new FileStream(file, FileMode.Open, FileAccess.Read)) {
        byte[] buffer = new byte[1024];
        int bytesRead = 0;
        while ((bytesRead = fileStream.Read(buffer, 0, buffer.Length)) != 0)
        memStream.Write(buffer, 0, bytesRead);
    }
    memStream.Write(endBoundaryBytes, 0, endBoundaryBytes.Length);
    request.ContentLength = memStream.Length;
               
    using (Stream requestStream = request.GetRequestStream()) {
        memStream.Position = 0;
        byte[] tempBuffer = new byte[memStream.Length];
        memStream.Read(tempBuffer, 0, tempBuffer.Length);
        memStream.Close();
        requestStream.Write(tempBuffer, 0, tempBuffer.Length);
    }
               
    using (var response = request.GetResponse()) {
        Stream stream2 = response.GetResponseStream();
        StreamReader reader2 = new StreamReader(stream2);
        return reader2.ReadToEnd();
    }
}               
            

This is the code for doing that.


static internal string SendPhotoMessage(
    string chatid, string filepath, string fileid, string msg) {
    if (filepath != "") {
        HttpWebRequest request = (HttpWebRequest)WebRequest.Create(String.Format(
            "{0}/bot{1}/sendPhoto",
            baseurl, Properties.Settings.Default.BotToken));
        request.ContentType = "multipart/form-data";
        request.Method = "POST";
        NameValueCollection form = new NameValueCollection();
        form["chat_id"] = chatid;
        form["caption"] = msg;
        string response = InputOnlineFile(request, filepath, "photo", form);
        response = response.Substring(response.LastIndexOf("file_id\":\"") + 10, 100);
        response = response.Substring(0, response.IndexOf('"'));
        return response;
    } else {
        WebRequest request = WebRequest.Create(String.Format(
            "{0}/bot{1}/sendPhoto?chat_id={2}&photo={3}&caption={4}",
            baseurl, Properties.Settings.Default.BotToken, chatid, fileid, msg));
            using (WebResponse response = request.GetResponse()) {
                request.Timeout = 10000;
            }
            return "";
        }
    }
                   
    static internal string SendDocumentMessage(
        string chatid, string filepath, string fileid, string msg) {
        if (filepath != "") {
            HttpWebRequest request = (HttpWebRequest)WebRequest.Create(String.Format(
                "{0}/bot{1}/sendDocument",
                baseurl, Properties.Settings.Default.BotToken));
            request.ContentType = "multipart/form-data";
            request.Method = "POST";
            NameValueCollection form = new NameValueCollection();
            form["chat_id"] = chatid;
            form["caption"] = msg;
            string response = InputOnlineFile(request, filepath, "document", form);
            response = response.Substring(response.LastIndexOf("file_id\":\"") + 10, 100);
            response = response.Substring(0, response.IndexOf('"'));
            return response;
        } else {
            WebRequest request = WebRequest.Create(String.Format(
                "{0}/bot{1}/sendDocument?chat_id={2}&document={3}&caption={4}",
                baseurl, Properties.Settings.Default.BotToken, chatid, fileid, msg));
            using (WebResponse response = request.GetResponse()) {
                request.Timeout = 10000;
            }
            return "";
        }
   }                   
            

This little starting tutorial ends here.

Javascript is the language of the moment. An interesting new project is born every week.

But, what is WebAssenbly? From the official website we read:

WebAssembly (abbreviated Wasm) is a binary instruction format for a stack-based virtual machine. Wasm is designed as a portable target for compilation of high-level languages like C/C++/Rust, enabling deployment on the web for client and server applications.

WebAssembly is a technology that creates a virtual machine in the browser where it is possible to execute code not designed for the web
Even more interesting for .NET programmers, the Mono Project has developed a virtual machine in WebAssembly for the Mono runtime, with which it's possible to run C# programs natively by the browser.
There is another technology that allows you to run C# code in the browser. It's Blazor and belongs to Microsoft.
Blazor is a frontend framework and allows you to develop a full C# application that runs natively by the browser.
Mono-WASM allows you to create even a single piece of the application and to request it from Javascript code.

Let's try using Mono-WASM
In this basic tutorial we create a simple C# library and run it in the browser, making it interact with the HTML page using Javascript. Let's get the necessary tools first.

Download and install Mono SDK.
https://www.mono-project.com/download/stable/

Get the latest build of Mono-WASM from this site
https://jenkins.mono-project.com/job/test-mono-mainline-wasm/

Download sdks/wasm/mono-wasm-###########.zip and extract it, for example in C:\mono-wasm

After installation, add a path to the bin directory of mono (C:\Program Files\Mono\bin) and Mono-WASM (C:\mono-wasm) directory in environment paths variable.
Make sure you can access mono and Mono-WASM directly from your terminal.

Now create a folder to use for the project, for example

C:\Test

Create a Sample.cs file with a simple C# class that includes a static method

using System;

public class Sample
{
public static string Hello(string Name)
{
return "Hello " + Name;
}
}

We also create an index.html file

<!doctype html>
<html lang="en">

<head>
<meta charset="utf-8">
<meta name="viewport" content="width=device-width, initial-scale=1, shrink-to-fit=no">
<title>Hello WASM</title>
</head>

<body>
<form>
<textarea id="output" rows="10"></textarea>
<button type="button" id="button" onclick="App.onClick">Run WASM</button>
</form>

<script type='text/javascript'>
let that = this;
var App = {
onClick: function () {
that.output.value = "Please wait";
that.output.value = that.execute("Noos");
},

init: function () {
that.execute = Module.mono_bind_static_method("[Sample] Sample:Hello");
that.output = document.getElementById("output");
that.button = document.getElementById("button");
that.button.disabled = false;
}
};

document.getElementById("button").addEventListener("click",App.onClick);
document.body.addEventListener("load", App.init);
</script>
<script type="text/javascript" src="/mono-config.js"></script>
<script type="text/javascript" src="/runtime.js"></script>
<script async type="text/javascript" src="/dotnet.js"></script>
</body>

</html>

Bound a static method of .NET to a JS variable:

var execute = Module.mono_bind_static_method("[Sample] Sample:Hello");

Module is an object that is injected by mono.js files into the page. This object has many methods but one of the most useful ones is the mono_bind_static_method. With this method, you can bind any static methods from .NET to the JS world and execute it like a simple JS function.

Using command prompt, compile the code in NET assemblies with Mono

mcs /target:library -out:Sample.dll /noconfig /nostdlib 
/r:C:\mono-wasm\wasm-bcl\wasm\mscorlib.dll
/r:C:\mono-wasm\wasm-bcl\wasm\System.dll
/r:C:\mono-wasm\wasm-bcl\wasm\System.Core.dll
/r:C:\mono-wasm\wasm-bcl\wasm\Facades\netstandard.dll
/r:C:\mono-wasm\wasm-bcl\wasm\System.Net.Http.dll
/r:C:\mono-wasm\framework\WebAssembly.Bindings.dll
/r:C:\mono-wasm\framework\WebAssembly.Net.Http.dll Sample.cs

As you can see with -out we defined the output name of our assembly. At the end of the command, you should add the CSharp files you want to compile. Other assemblies are inside the Mono-WASM directory that is referenced for compilation.
If you compiled the code successfully, Sample.dll assembly should be created.

So we can publish the library for web assembly using Mono-WASM

mono C:\mono-wasm\packager.exe --copy=always --out=.\publish --asset=.\index.html Sample.dll

This command run packager.exe which is a tool from Mono that publishes your assembly with all of the requirements. The packager will create a folder called publish, and it will copy things in it.

mono.js, mono-config.js, and runtime.js are mono bindings for JavaScript.
mono.wasm is the Mono .NET runtime for web assembly.
In managed folder you will see lots of DLL assembly files including your Sample.dll.
You can copy content of publish folder on your static web server
Run it and navigate to the URL.

This post is made to teach you how to create and set up a simple fully functional Telegram bot written in pure PHP.
There are many good ready to use SDKs written in PHP.
This is only a simple tutorial that explains how to interact with the Telegram APIs without use of any SDK.

Bots are third-party applications that run inside Telegram. Users can interact with bots by sending them messages, commands and inline requests.
At the core, Telegram Bots are special accounts that do not require an additional phone number to set up.
Messages, commands and requests sent by users are passed to the software running on your servers.
Telegram intermediary server handles all encryption and communication with the Telegram API for you.
You communicate with this server via a simple HTTPS-interface that offers a simplified version of the Telegram API.
Telegram Bot API is an HTTP-based interface created for developers keen on building bots for Telegram.

How do I create a bot? There's a... bot for that.
BotFather is the one bot to rule them all. It will help you create new bots and change settings for existing ones.
Message @BotFather with the /newbot command to create a new bot. The BotFather will ask you for a name and username, then generate an authorization token for your new bot.
If you don't know how to message by username, click the search field on your Telegram app and type @BotFather, where you should be able to initiate a conversation. Be careful not to send it to the wrong contact, because some users have similar usernames to BotFather.

The name of your bot is displayed in contact details and elsewhere.

The Username is a short name, to be used in mentions and telegram.me links. Usernames are 5-32 characters long and are case insensitive, but may only include Latin characters, numbers, and underscores. Your bot's username must end in ‘bot’, e.g. ‘tetris_bot’ or ‘TetrisBot’.

The token is a string along the lines of 110201543:AAHdqTcvCH1vGWJxfSeofSAs0K5PALDsaw that is required to authorize the bot and send requests to the Bot API. Keep your token secure and store it safely, it can be used by anyone to control your bot.
If your existing token is compromised or you lost it for some reason, use the /token command to generate a new one.

In order to make your Bot answering to requests from your Telegram users you can register a WebHook to automatically being called once updates are available.
The quickest and easiest way to set a WebHook for your Bot is to issue a GET request to the Bot API.
All you have to do is to call the setWebHook method in the Bot API via the following url write in your browser

https://api.telegram.org/bot{my_bot_token}/setWebhook?url={url_to_send_updates_to}


where
my_bot_token is the token you got from BotFather when you created your Bot
url_to_send_updates_to is the url of the piece of code you wrote to implement your Bot behavior (in order to set a Webhook you need a server with HTTPS)
For instance

https://api.telegram.org/bot123456:ABC-DEF1234ghIkl-zyx57W2v1u123ew11/setWebhook?url=https://www.example.com/my-telegram-bot.php


And you’ve got it.
Now if you go to the following url (you have to replace {my_bot_token} with your Bot Token)

https://api.telegram.org/bot{my_bot_token}/getWebhookInfo


you should see something like this


{
    "ok":true,
    "result": 
    {
        "url":"https://www.example.com/my-telegram-bot.php",
        "has_custom_certificate":false,
        "pending_update_count":0,
        "max_connections":40
    }
}
                

Now let's explain how to develop the bot PHP file.
In your favorite editor, create a my-telegram-bot.php file with the following content.


<?php
$botToken = "123456:ABC-DEF1234ghIkl-zyx57W2v1u123ew11";
$botAPI = "https://api.telegram.org/bot" . $botToken;
                        
$update = file_get_contents('php://input');
$update = json_decode($update, TRUE);
                        
if (!$update) {
    exit;
}
$message = isset($update['message']) ? $update['message'] : "";
                

where
$botToken is the bot token, generated by BotFather for your bot and used to register the bot on the Webhook service
$botAPI is the URL used to send commands to the Telegram API
file_get_contents('php://input') handle the call incoming from Telegram server
json_decode($update, TRUE) decode communication message in a JSON structure
if (!$update) { exit; } if it's not a valid JSON command, it exits the script
$message if it's a valid command, it extracts the sent message

The script can already be published; it still does nothing but works already.
Now let's add some lines to extract useful data from the message incoming


$messageId = isset($message['message_id']) ? $message['message_id'] : "";

$messageText = isset($message['text']) ? $message['text'] : "";
$messageText = trim($messageText);
$messageText = strtolower($messageText);
                        
$date = isset($message['date']) ? $message['date'] : "";
                        
$chatId = isset($message['chat']['id']) ? $message['chat']['id'] : "";
$username = isset($message['chat']['username']) ? $message['chat']['username'] : "";
$firstname = isset($message['chat']['first_name']) ? $message['chat']['first_name'] : "";
$lastname = isset($message['chat']['last_name']) ? $message['chat']['last_name'] : "";
                

where
$messageId is the unique identification number of the chat message
$messageText if it is a text message, the text contained in the message sent
$date is the date the message was sent
$chatId is the unique id of the user who sent the message
$username is the username of the user who sent the message
$firstname is the firs tname of the user who sent the message
$lastname is the last name of the user who sent the message

Message is not necessarily a text, it is possible to managed the type of incoming message with the following lines


if (isset($message['text'])) {
    $response = "Received a text message: " . $message['text'];
} elseif (isset($message['audio'])) {
    $response = "Received an audio message";
} elseif (isset($message['document'])) {
    $response = "Received a document message";
} elseif (isset($message['photo'])) {
    $response = "Received a photo message";
} elseif (isset($message['sticker'])) {
    $response = "Received a sticker message";
} elseif (isset($message['video'])) {
    $response = "Received a video message";
} elseif (isset($message['voice'])) {
    $response = "Received a voice message";
} elseif (isset($message['contact'])) {
    $response = "Received a contact message";
} elseif (isset($message['location'])) {
    $response = "Received a location message";
} elseif (isset($message['venue'])) {
    $response = "Received a venue message";
} else {
    $response = "I received a message?";
}
                

When a photo is sent to the bot, you can retrieve the file and its info from Telegram API.


if (isset($message['photo'])) {
    $fileAPI = "https://api.telegram.org/file/bot" . $botToken;
    $url = $GLOBALS[botAPI] . '/getFile?file_id=' . $message['photo'][0]['file_id'];
    $fileinfo = file_get_contents($url);
    $fileinfo = json_decode($fileinfo, TRUE);                          
    $filePath = $fileinfo['result']['file_path'];
    $url = $GLOBALS[fileAPI] . '/' . $filePath;
                          
    $imgData = "File size: " . $message['photo'][0]['file_size'] . "byte" . chr(10)
        . "Width: " . $message['photo'][0]['width'] . "px" . chr(10)
        . "Height: " . $message['photo'][0]['height'] . "px" . chr(10)
        . "URL: " . $url);
}
                

where
$fileAPI is the URL used to retrieve file info from Telegram API
$fileinfo the script performs an HTTP GET call to get file info in JSON format
$filePath the script get the URL path of file
$message['photo'][0]['file_size'] is the size of the first file in byte
$message['photo'][0]['width'] and $message['photo'][0]['height'] are the dimension of the first file in pixels

Bot can send several type of message to the chat

Text messages


$url = $GLOBALS[botAPI] . '/sendMessage?chat_id=' . $chatId . '&text=' . urlencode($message);
file_get_contents($url);
                

Photo messages


$url = $GLOBALS[botAPI] . '/sendPhoto?chat_id=' . $chatId . '&photo=' . urlencode("https://webnoos.altervista.org/noos.jpeg");
file_get_contents($url);
                

Location messages


$url = $GLOBALS[botAPI] . '/sendLocation?chat_id=' . $chatId . '&latitude=' . urlencode("45.1") . '&longitude=' . urlencode("11.3");
file_get_contents($url);
                

Telegram also features the ability to display keyboards in chat like this


header("Content-Type: application/json");
$parameters = array('chat_id' => $chatId, "text" => $messageText);
$parameters["method"] = "sendMessage";
$parameters["reply_markup"] = '{ "keyboard": [["uno", "due"], ["tre"], ["quattro", "5", "6"]], "one_time_keyboard": false}';
echo json_encode($parameters);
                

The current keyboard can be removed from the chat in this way


header("Content-Type: application/json");
$parameters = array('chat_id' => $chatId, "text" => $messageText);
$parameters["method"] = "sendMessage";
$parameters["reply_markup"] = '{ "remove_keyboard" : true}';
echo json_encode($parameters);
                

You can also display an inline keyboard


header("Content-Type: application/json");
$parameters = array('chat_id' => $chatId, "text" => $messageText);
$parameters["method"] = "sendMessage";
$keyboard = ['inline_keyboard' => [[
    ['text' =>  'Vai su Google', 'url' => 'https://www.google.com'],
    ['text' => 'Vai su Microsoft', 'url' => 'https://www.microsoft.com']
]]];
$parameters["reply_markup"] = json_encode($keyboard, true);
echo json_encode($parameters);
                

Finally, you have the ability to manage messages sent to the bot as a series of commands, to do different things, as in this example


switch ($messageText) {
    case "/hi":
        // TODO
        break;
                          
    default:
        // TODO
}
                

This little starting tutorial ends here.

This is a short step-by-step tutorial to distribute a .NET Core application in a docker image.
I’ll cover how you can use Docker to run your application in an isolated, minimal environment with fewer moving parts.

To build and distribute a .NET Core application in Docker, first we need an application to Dockerize and some prerequisites.

In this tutorial, we'll perform the steps from a Terminal, like Windows command prompt.

First, create a working folder for our exercise

mkdir NetCoreDocker


Check .NET Core version installed on your computer

dotnet --info


Check Docker version installed on your computer

docker version


Place a file named global.json in exercise directory with the following content


{ 
    "sdk": { 
        "version": "3.0.100" 
    } 
}
                

This will force the compiler to use 3.0 version of the SDK

Then create .NET Core console application

dotnet new console -o app -n myapp


The folder structure will be similar to the following example


NetCoreDocker 
│   global.json 
│ 
└───app 
    │   myapp.csproj 
    │   Program.cs 
    │ 
    └───obj 
        myapp.csproj.nuget.cache 
        myapp.csproj.nuget.g.props 
        myapp.csproj.nuget.g.targets 
        project.assets.json
                

.NET Core creates a console application that is executed, then terminated.
We modify the application that runs continuously instead.

Modify Program.cs as below


using System; 
 
namespace myapp 
{ 
    class Program 
    { 
        static void Main(string[] args) 
        { 
            var counter = 0; 
            var max = args.Length != 0 ? Convert.ToInt32(args[0]) : -1; 
            while(max == -1 || counter < max) 
            { 
                counter++; 
                Console.WriteLine($"Counter: {counter}"); 
                System.Threading.Tasks.Task.Delay(1000).Wait(); 
            } 
        } 
    } 
}
                

Move in app sub-folder and test application

dotnet run


Finally, publish the application

dotnet publish -c Release


Application will be published in this folder

NetCoreDocker\app\bin\Release\netcoreapp3.0\publish


Place a file named Dockerfile in the working folder with the following content


FROM mcr.microsoft.com/dotnet/core/runtime:3.0
COPY app\bin\Release\netcoreapp3.0\publish app/ 
ENTRYPOINT ["dotnet", "app/myapp.dll"]
                

Now we can build Docker image of our application

docker build -t myimage -f Dockerfile .


Finally, verify the right build of the image

docker images


Final notice

If you want to try starting from the source code of your application (contained in the /src folder, not in the /app folder like now) and compile directly on a Docker image, change the Dockerfile contents with this multistage builds


FROM mcr.microsoft.com/dotnet/core/sdk:3.0 AS build
WORKDIR /src
COPY ["myapp.csproj", "./"]
RUN dotnet restore "./myapp.csproj"
COPY . .
RUN dotnet build "myapp.csproj" -c Release -o /app
                        
FROM build AS publish
RUN dotnet publish "myapp.csproj" -c Release -o /app
                        
FROM mcr.microsoft.com/dotnet/core/runtime:3.0 AS base
WORKDIR /app
EXPOSE 5001
                        
FROM base AS final
WORKDIR /app
COPY --from=publish /app .
ENTRYPOINT ["dotnet", "myapp.dll"]
                

Taken from: http://enyojs.com

Enyo 2 has its roots in the framework developed to power the applications on HP’s TouchPad, an innovative device powered by webOS that embraced the web stack as its primary application environment. Over a thousand apps, including the stock applications that shipped with the TouchPad, were built using Enyo 1. Although Enyo was conceived from the start as platform-independent framework, Enyo 1 out of necessity targeted webOS and the TouchPad specifically.

The basics Create an empty gadget.xml file with Notepad and save it. In the Encoding drop-down, select UTF-8. Create an empty MyGadget.html file with Notepad and save it. In the Encoding drop-down, select UTF-8.

Create the manifest gadget.xml file and save it to folder.

<?xml version="1.0" encoding="utf-8" ?>
<gadget>
 <name>MyGadget</name>
 <version>1.0.0.0</version>
 <hosts>
 <host name="sidebar">
 <base type="HTML" apiVersion="1.0.0" src="/MyGadget.html" />
 <permissions>Full</permissions>
 <platform minPlatformVersion="1.0" />
 </host>
 </hosts>
</gadget>

From: www.tutorialsforopenoffice.org

A Macro is a sequence of keystrokes that are recorded (saved) and given a name. When the Macro is run (selected) by a few keystrokes, the recorded keystrokes are “automatically” performed.

Tratto da: openoffice.org

Supponete di dover inserire ripetutamente sempre le stesse informazioni. Sebbene sia possibile memorizzare le informazioni negli appunti, se questi nel frattempo vengono utilizzati, il loro contenuto cambia. Una semplice soluzione consiste nel memorizzare i dati in una macro (in alcuni semplici casi, come l'esempio utilizzato in questa sede, una soluzione migliore consiste nell'utilizzo del completamento automatico).